More on stretching fiber / quilted art---
I did succeed in getting my Rock Art piece on the stretchers bars- properly sealed wood, of course! Here it is, hanging in our dining room--

And here's the back--

I learned that Warm and Natural batting, which is what I use on most of my wall art, is bulkier than the low loft poly I used on Shannon's fabric panels. So I need to cut more out of the corners. And a reader, Ann, suggested installing a brace or corner braces on larger sets of bars- a good idea which I will use on future pieces. But overall, I am happy with how this came out. Last night I took this and the Watchers piece to a small gallery in Spanish Fork (that also happens to be part of a tatoo parlor), and the guys loved them. So they are hanging there, we will see if I have any takers.
I also got the preliminary stitching done on my tree for the Autum Mountains quilt. Now I can see what the tree looks like on the background. Sorry the tree photographs so lousy, but nothing I do in Elements seems to help.

I'll leave this on the design wall for me to look at before I take the next steps.
Fabric stretched on a frame-
I blogged last fall about my two pieces for the Surface Design show at the Covey Gallery, both of which I had stretched on stretcher bars. I loved the look this gives fabric pieces, but the cost of having it done seemed high to me. Encouraged by Lyric Kinard's article in the most recent Quilting Arts magazine, and some email exchanges, I decided to do my Rock Art piece myself. Then my daughter Shannon wanted some fabric panels to brighten up her room- the perfect opportunity to practice before trying the process on my quilted art.
I even went so far as to make my own stretchers- we got 1 X 2 lumber, cut the mitered corners, and glued and nailed the frames. It really wasn't that hard, although I am grateful to have a nail gun, compressor, and chop saw that easily cuts miters. We finished those last weekend, and left them for the glue to really set.
Last night I headed to the studio. I cut backing from some drapery lining fabric I had on hand, low loft poly batting, and then the home dec fabric Shannon wanted. I laid the frame on the back side of the fabric sandwich--

Here you can see the three layers, before I started stapling to the frame--

First, I stapled the sandwich on one long side, then on the opposite side, then on the two short sides. Now it looks like this--

Then I stapled one corner, folding the corner edge down like I would if I were wrapping a package. As a reinforcement for my mitered corners, I stapled so my staples went into both sides of the frame. Then I cut out some of the excess fabric.

Then I folded each side down, and stapled to the frame. From there I continued stapling to the first staple in the middle of the two sides.
I did three fabric panels in all, and my corners got better with each one. Here's the back and a corner detail of the second one I did. After I finished stapling, I inserted screw eyes inside the frame, and wound picture wire between them.
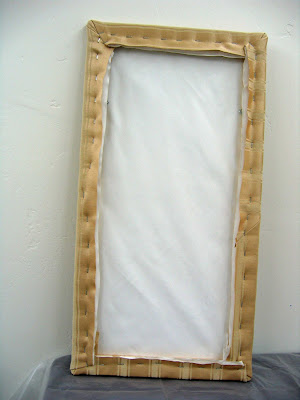

These pieces are 14" by 28", which was not difficult to work. And here are the finished panels hung in Shannon's room, over her bed.

If you remember earlier posts about the display boards Shannon made with fabric, ribbon, and foam insulation, here they are completed and hung in her room.

So now I will prepare to stretch my Rock Art quilt. The frame is already made, slightly larger than these- 21" by 24". I will do one additional step that I did not do on these panels- I will seal the wood with a clear polyurethane. (Home dec, I'm not too worried about archival preservation.) Then I will use the same process to stetch the quilt around the bars.
I used a heavy duty stapler that can be bought at any hardware store. I got the straightest 1 X 2's I could find at Home Depot, they were only about $2 for an 8' piece of lumber. All in all, this was easier than I thought it would be, and LOTS cheaper than paying someone to do it for me.
If I'm lucky, I'll be able to post a picture of the Rock Art quilt later this weekend, ready to hang.


